
In order to configure firewall rules in our platform you can follow these steps. They include examples if you’re looking for a more visual experience.
Note: This tutorial does not cover how to create a Virtual Machine (VM).
Finding the Virtual Machine
Note: Ensure that the logged-in account has the necessary permissions to perform these actions.
1) Look for your instances in the left-side menu.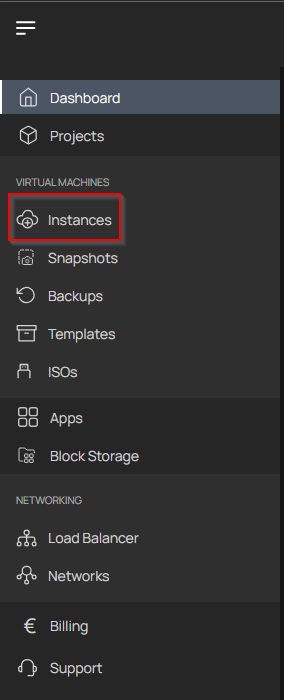
2) Locate the Virtual Machine you wish to modify and click on it. In this example, we use a machine named vm-f-95uiavvd. Take note of the Public IP Address; in this case, it is 154.46.30.107.

Configuring the VM
1) Inside the next section, click on VM Settings.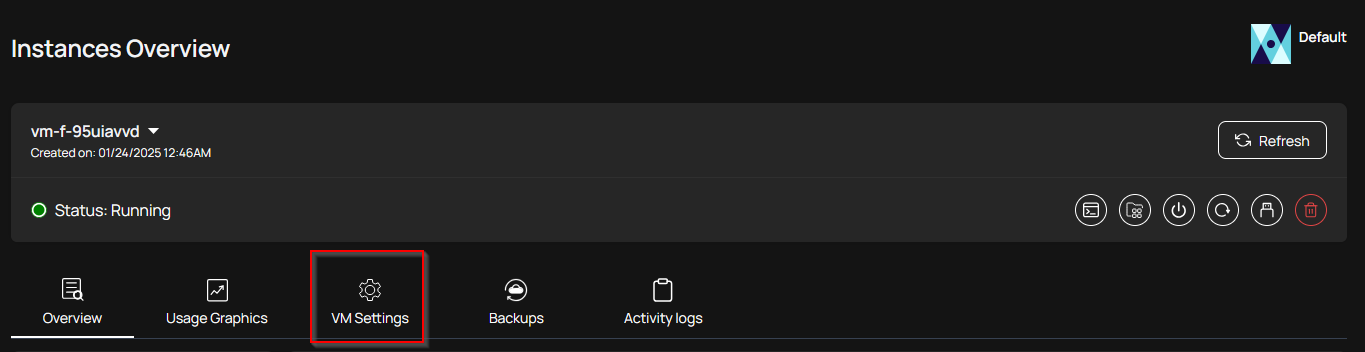
2) Under the VM Settings section, find the Firewall option in the menu.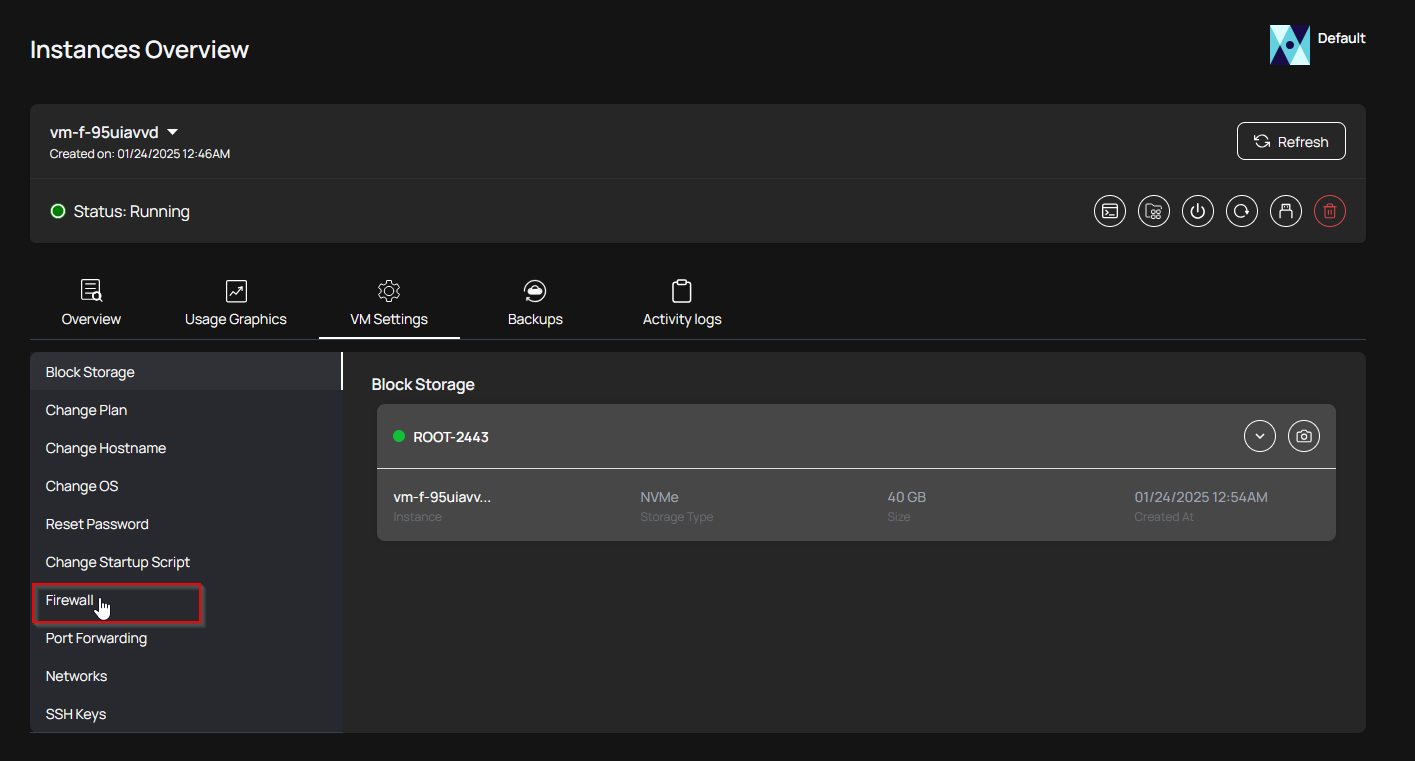
3) Click on Firewall.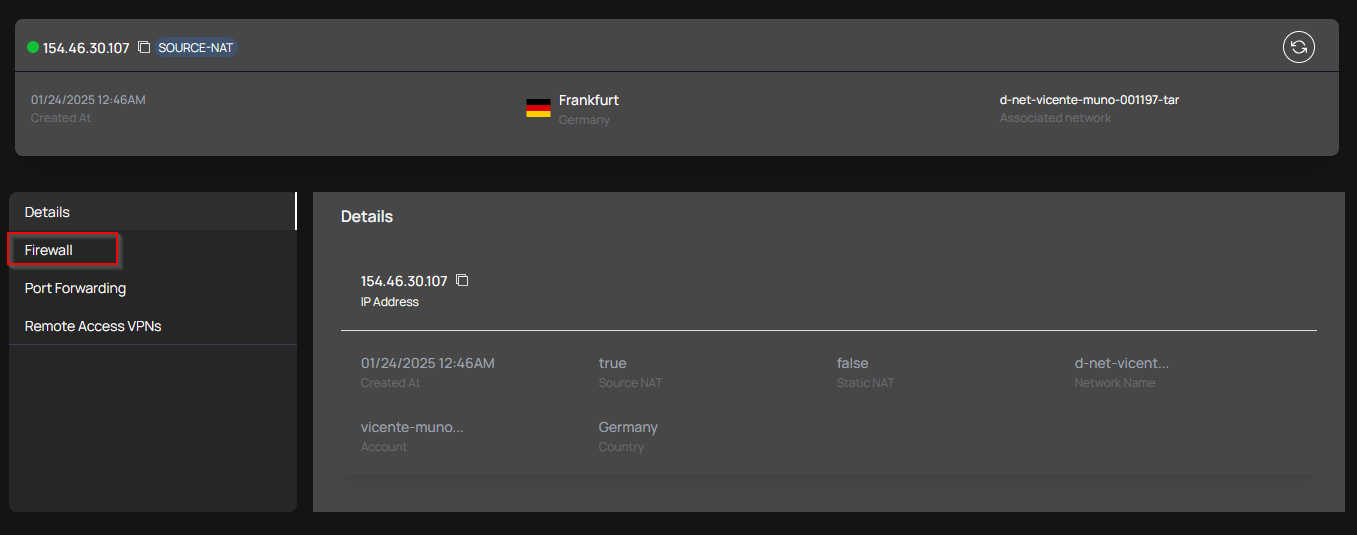
4) Click on + Add A Firewall Rule.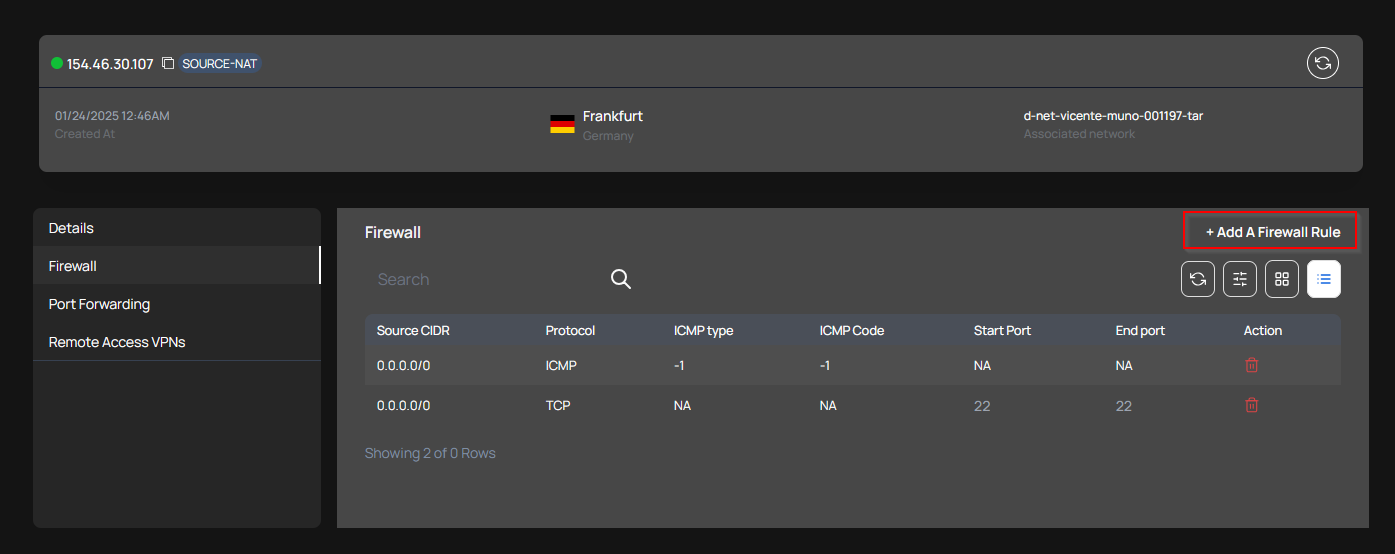
Adding a Firewall Rule
In the Add Firewall Rule section, enter the following details:
- Source CIDR: Define the specific IP ranges allowed access.
- Protocol: Select the desired protocol (e.g., TCP in this example).
- Start Port: Specify the initial port if opening a range of ports.
- End Port: Specify the last port if opening a range. If allowing only one port, set the Start and End ports to the same value.
Click Add Firewall Rule.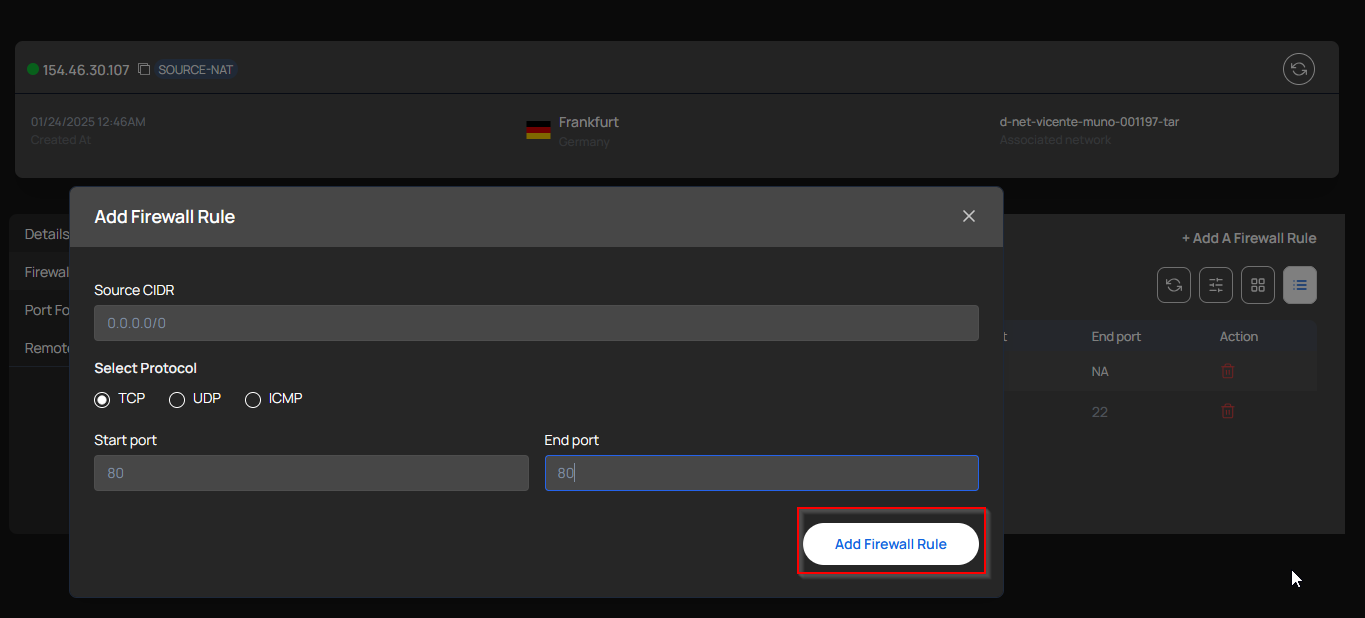
Once the rule is added, the resulting configuration will appear on the next screen. 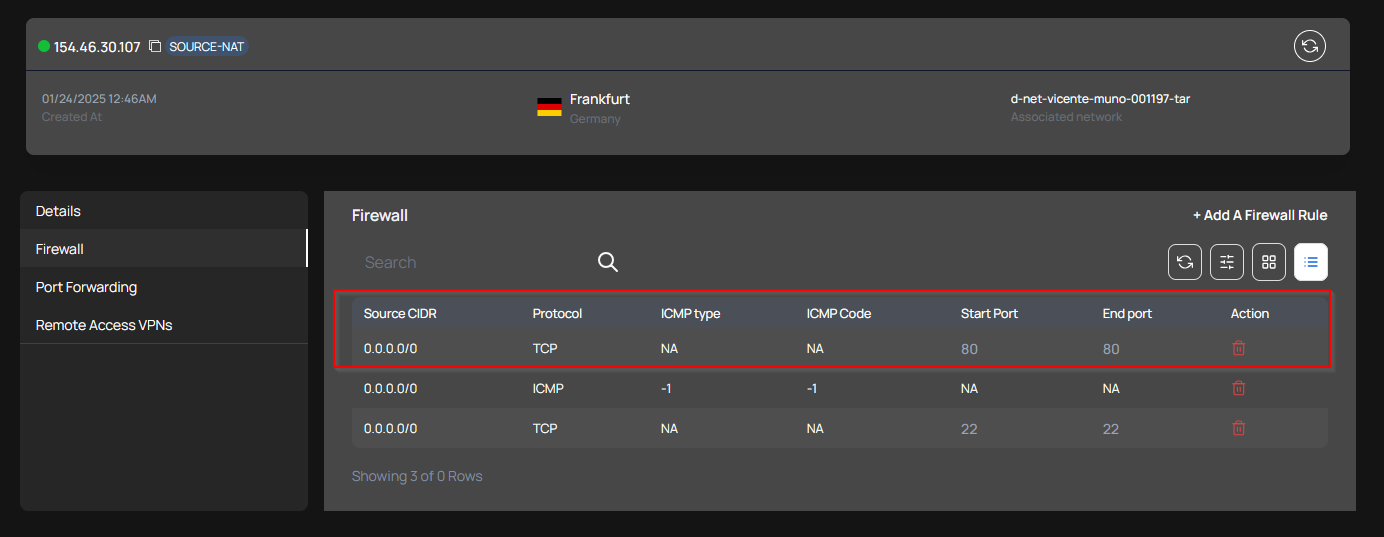
Configuring Port Forwarding
- Click on the Port Forwarding section.
- Click on + Add Rule, then enter the following details:
- Private Port: The port range referencing the VM.
- Public Port: The port range referencing the public IP.
- Protocol: Select TCP (used in this example for a Web Server test).
- In the dropdown menu, select the host to assign this rule to.
- Click Save.
Note: The private ports and the public ports are mapped to match each other but other ports can be used if required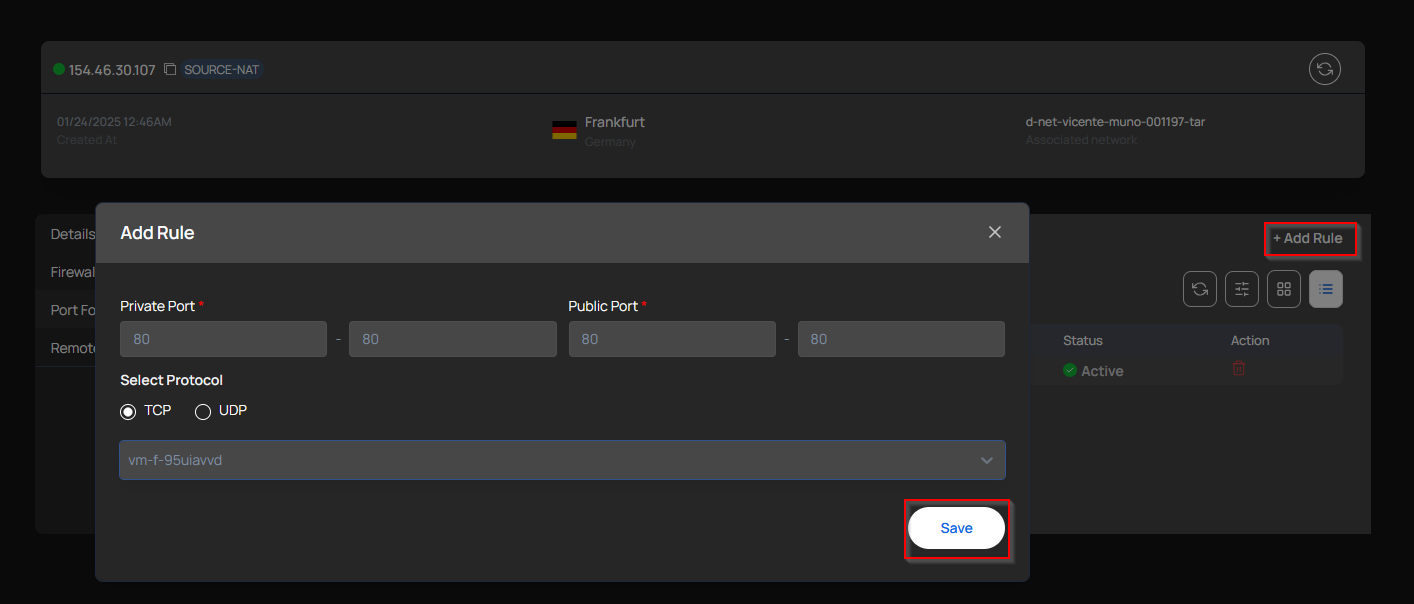
Note: The private and public ports are typically mapped to match each other, but different ports can be used if required.
Testing the Configuration
To verify that the setup works as intended, open a browser and access the public IP. If configured correctly, you should be able to reach the Web Server. 