
If you run a server, you’ve probably seen botnets probe your system for vulnerabilities. But how can you prevent brute-force attacks, SQL injection, or other intrusion techniques if a service needs to be exposed? In this guide, I’ll show you how to install Crowdsec on Ubuntu so you can catch attackers red-handed and banish them to the shadow realm.
How Crowdsec Works: Key Terms to Know
Blocking attackers manually isn’t a viable long-term solution, as it would quickly become a full-time job. In the past, I might have turned to Fail2Ban for this task, and although it did a decent job, I found that clever attackers would find ways to get around its algorithm.
These days, I use Crowdsec to protect my servers instead. Crowdsec crowdsources IP blocklists by sharing detections with other users.
How does it perform this task? Here’s a brief explanation in plain language (with Crowdsec lingo in bold):
When installed on your system, Crowdsec (the security engine) reads your log files (using parsers) to look for intrusion attempts (scenarios). If it detects a bad actor, then it calls on a program (the bouncer) to carry out a defensive action (decision), such as banning the IP address.
Like a neighborhood watch, Crowdsec shares that IP with other security engines, so other servers around the world can take preventative action.
Crowdsec Installation on Ubuntu Server 24.04
Crowdsec runs on many platforms (Linux, Windows, MacOS, Kubernetes, etc.), and in this guide, I’ll walk you through an installation on Ubuntu Server 24.04.
Need to get a server up fast? Check out our hassle-free deployments of Ubuntu and other operating systems.
1. Install Crowdsec
To get the newest version, add the Crowdsec repository:curl -s https://install.crowdsec.net | sudo sh
Update to refresh repo packages:sudo apt update
Install Crowdsec package:sudo apt install crowdsec
Check if it’s started and enabled by default:sudo systemctl status crowdsec

To invoke Crowdsec from the command line, you’ll be using the cscli command often.
For example, it has already marked some services to scan: sudo cscli parsers list
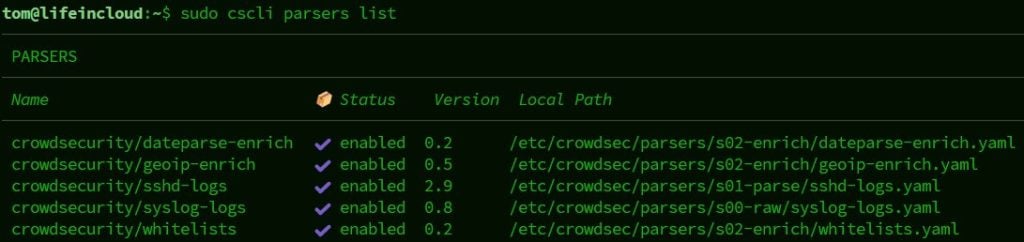
From the output, we can see that Crowdsec is protecting our SSH server and general system events.
The parsers check for scenarios, such as vulnerability exploits:sudo cscli scenarios list
These parsers and scenarios were installed by default. Later on, I’ll show you an easy way to add other services to protect.
2. Install a Bouncer
Crowdsec won’t take action by default unless you install a bouncer to take care of things.
In our case, we want to ban IP addresses that attack our server.
Install firewall bouncer:sudo apt install crowdsec-firewall-bouncer-iptables
Check what bouncers are active: sudo cscli bouncers list
Now when naughty behavior is detected, the bouncer will ban the IP and report it. If you check your SSH log (e.g., /var/log/auth.log), you’ll notice it’s suddenly gotten a lot quieter. That’s because Crowdsec has already implemented bans from its shared Community Blocklist.
So that’s a basic working setup, with only two packages to install. Next, let’s crank up the power.
Extending Crowdsec’s Capabilities
In this section, I’ll show you how to add more services to protect and import third-party IP blacklists.
Use Crowdsec Collections to Protect Specific Services
For those starting out, it’s easier to use parser/scenario bundles that have been pre-defined.
Crowdsec calls these collections, but you can just think of it as specifying which service to protect.
1. Add collections.
Check which collections you already have:sudo cscli collections list
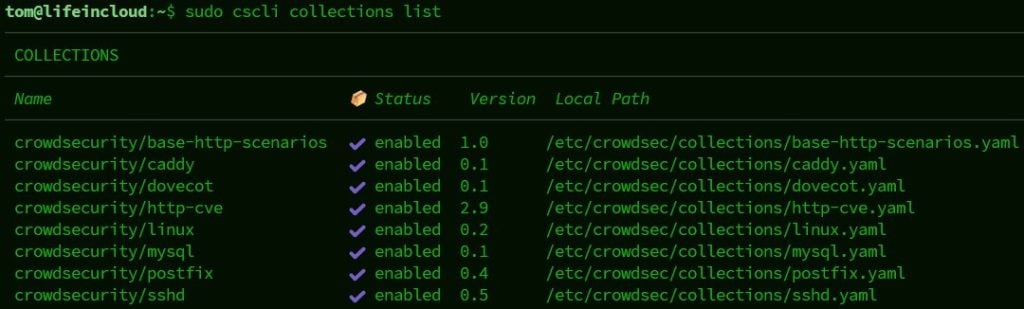
List all collections available for installation: sudo cscli collections list -a
Peruse this list (or here) to find services your server uses.
I run a Caddy web server, so I’ll add it to Crowdsec using the collection name.
Install collections:sudo cscli collections install crowdsecurity/caddy
If you run Apache/Nginx, a MySQL database, or Postfix+Dovecot, I recommend adding those collections as well.
2. Reload the configuration whenever changes are made:
sudo systemctl reload crowdsec
3. Tell Crowdsec where to find log files.
Crowdsec won’t automatically know where to find service logs.
After installing a collection, you need to tell Crowdsec where to look by editing the Acquisitions file.
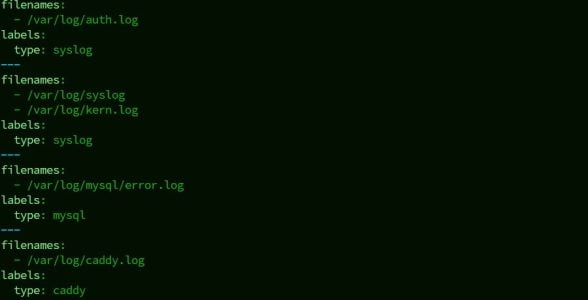
Edit the Acquisitions file:sudo nano /etc/crowdsec/acquis.yaml
Notice how each service is divided by a separator (—).
Unfortunately, what to write here isn’t always obvious.
It’s best to copy/paste the format for your collections from the official Collections hub.
For example, if you have a Webmin setup, here’s its collection template from the site above:

Paste this text into the acquis.yaml file.
Then, change the path and filename to match where the log file is on your system.
Here’s an example of mine:
Optional: Add Third-Party Blocklists to Crowdsec
Crowdsec already shares your bans with other users and vice versa via its Community Blocklist. But there’s a way to ban even more IPs with poor reputations by adding third-party blocklists. To get access to this feature, however, you’ll have to log in to the Crowdsec Console on the web.
Here’s how to add third-party blocklists:
1. Create a free account on Crowdsec.
2. Link your Crowdsec installation.
Once logged in, find the Enroll Command button, and paste it into your terminal:sudo cscli console enroll -e context [your_engine_id]
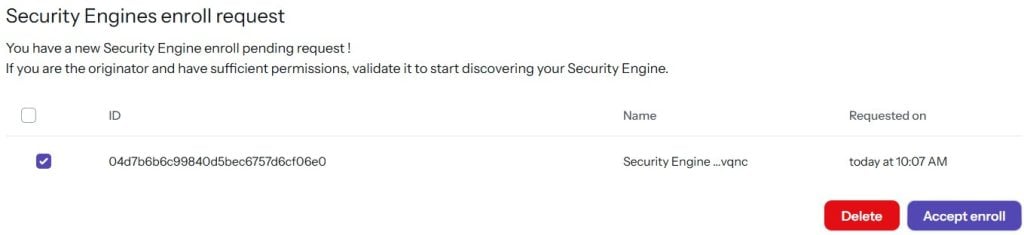
After a moment, a notification will appear on the website. Click Accept enroll.
Your server will be linked and appear on the dashboard. Reload the Crowdsec service.
3. Add blocklists.
Go to the Blocklist Catalog to browse what’s available. You can add up to 3 on a free account.
Here are my recommended blocklists for newcomers:
- Firehol cruzit.com list
- Firehol BotScout list
- Firehol greensnow.co list
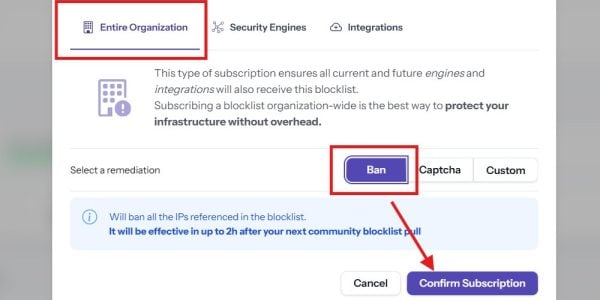
To add one, click Subscribe. I choose Ban as the default action to take.
Great, you’re all done! Pat yourself on the back for taking a crucial step in hardening your server.
FAQ
How do I know if Crowdsec is doing its job?
Check what Crowdsec has been up to:sudo cscli metrics
The Acquisition Metrics should reveal whether your service log files are being scanned properly.
How do I view which IPs got caught in the act?
View Crowdsec’s recent bans:cscli decisions list
You won’t see much here, as IPs get moved to the Community Blocklist soon after.
You can view a more complete list of past decisions on the Crowdsec Console.