
To host a website, all you need is a web server—sounds simple, right? It would be, except the configuration steps are often arcane or unclear. In this guide, I want to introduce to you a modern web server that’s easy to set up: Caddy. Read on to learn more about it and how to install a full Caddy stack on Ubuntu!
Need to get a server up and running fast? We offer cloud servers with Ubuntu and other major Linux operating systems. And if you need a website stack but want to skip the installation steps below, check out our 1-click deployments from the LifeinCloud marketplace.
Best Features of Caddy
Caddy is designed in a way that differentiates itself from other web servers. Sure, Apache is the old tried-and-true, with lots of examples out there. And Nginx is great for optimizing performance if you’re running a gigantic site with complex customization.
But Caddy fills that space in between, being easy and fast to get a site up and going.
Here’s why Caddy stands out:
- Simple configuration: It takes only a few lines to start working.
- Automatic web certificates: Caddy requests and renews free certificates for you.
- Reverse proxy: Unnecessary for a basic website, but Caddy’s easy reverse proxy configuration is a great bonus for advanced users looking to make the switch.
Installing Caddy on Ubuntu Server 24.04
Caddy isn’t found in Ubuntu’s default repository, so we’ll need to add an official repo to install it.
1. Install Caddy’s dependencies: sudo apt install debian-keyring debian-archive-keyring apt-transport-https curl
2. Add the official Caddy repository.
First, request the GPG key for secure package signing: curl -1sLf 'https://dl.cloudsmith.io/public/caddy/stable/gpg.key' | sudo gpg --dearmor -o /usr/share/keyrings/caddy-stable-archive-keyring.gpg
Next, add the repository to your system: curl -1sLf 'https://dl.cloudsmith.io/public/caddy/stable/debian.deb.txt' | sudo tee /etc/apt/sources.list.d/caddy-stable.list

Then, update your system to refresh packages from your newly added repository:sudo apt update
3. Install Caddy web server.sudo apt install caddy
4. Start Caddy and make it load automatically on boot: sudo systemctl start caddy
sudo systemctl enable caddy

So far so good.
5. Visit your new website.
Okay, let’s see if Caddy loads. Point a browser to your server’s IP address.
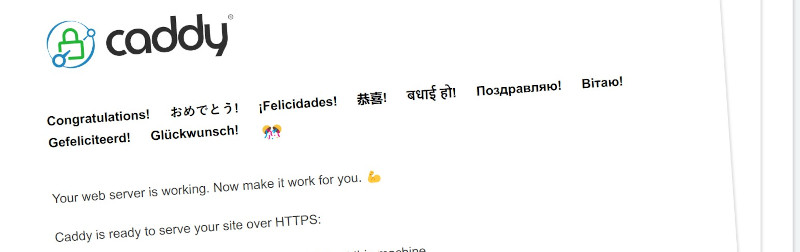
If you see this page, success!
Configuring Caddy to Load Your Website
Now that you’ve got Caddy up and running, how do you tell it what files to serve when website visitors arrive?
First, you have to choose a place to store your website files, and then you’ll edit Caddy’s configuration to point to them.
Store Website Files
It’s common to store websites in /var/www on your file system, with a separate folder for each site.
1. Let’s make an example site called mysite1 there: sudo mkdir -p /var/www/mysite1
2. And then create our first homepage:sudo nano /var/www/mysite1/index.html
By pasting these lines into index.html:
<!DOCTYPE html>
<html>
<body>
<h1>Hello, world!</h1>
</body>
</html>
Save & exit.
Set File Permissions for Security
Caddy creates a special user (caddy) to perform its functions. For security and proper functioning, we want certain files to be owned by the caddy user.
Lock down Caddy’s configuration file:sudo chown -R caddy:caddy /etc/caddysudo chmod 660 /etc/caddy/Caddyfile

Also make sure all website files are owned by Caddy: sudo chown -R caddy:caddy /var/www/mysite1
(Replace mysite1 with your website’s folder name.)
Edit Caddyfile Configuration
Now we’re ready to tell Caddy how to serve these files. It’s a 1-line edit.
1. Modify Caddy’s configuration:sudo nano /etc/caddy/Caddyfile
root * /var/www/mysite1: change the path on this line to point to your website’s files. For this example, I chose the mysite1 folder.
file_server: leave this line alone. This line tells Caddy to send website files to visitors (.html, .jpg, etc).

2. Restart to apply changes:sudo systemctl restart caddy
3. Test it.
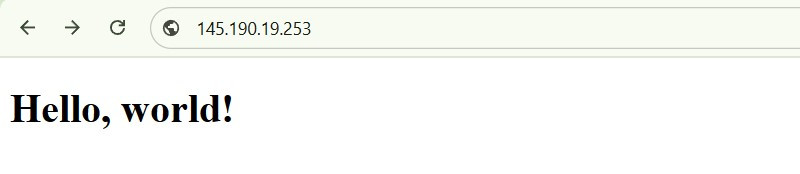
Open a web browser from your PC, and visit your server’s IP address.
Does your index.html load? If so, success!
Optional: Obtain a Website Certificate Using Caddy
Perhaps the best part of Caddy is that it will request, install, and renew free SSL certificates for your website.
But you must own a domain name (like lifeincloud.com) for this to work.
To enable certificates, open Caddy’s configuration, and replace :80 with your site’s domain name.
For example:

Restart the service, and you may also be prompted to run a special reload command: sudo systemctl restart caddy
sudo systemctl daemon-reload
Give Caddy a couple minutes to work its magic. Revisit your site, and it should now have a secure lock icon. Amazing!
Running a Full Stack with Caddy
Many websites serve dynamic content nowadays, so your web server needs extra help to fulfill these functions.
Below, I will give you a speedrun of how to create an LCMP stack (Linux + Caddy + MySQL + PHP).
PHP Integration for Caddy
PHP lets your website run web code.
1. Install the PHP fast process manager and some common extensions: sudo apt install php-fpm php-cli php-mysql php-gd php-xml php-curl php-mbstring php-zip
The PHP-FPM service should start automatically.
2. Integrate PHP into Caddy.
Open the Caddyfile configuration, and add this line: php_fastcgi unix//run/php/php-fpm.sock

Apply changes:sudo systemctl restart caddy
3. Test load a PHP page.
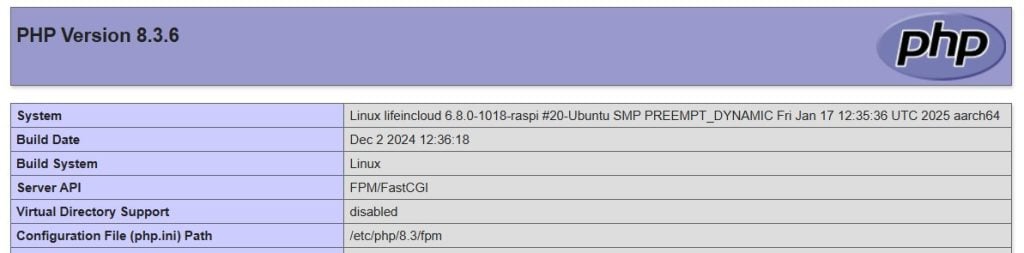
Create a file called index.php file in your website’s folder, and add this line to it:
<?php phpinfo(); ?>Now browser to your server’s IP or domain name. If configured properly, a page will load summarizing your system’s PHP configuration.
MySQL Database
Many websites need to manage data, on users or products for example, and a database is how it’s stored.
Install MySQL:sudo apt install mysql-server
This tutorial is meant to be a brief overview.
For more details on how to configure your database, check out our guide to installing MySQL.
You’re done creating an LCMP stack! I hope to visit your website powered by Caddy soon.
FAQ
I’ve installed Caddy correctly, but why can’t I connect to my website?
If you can’t connect to your website, it might be because your firewall is blocking port 80 and port 443 (common web ports).
Here’s how to open these ports on the default firewall on Ubuntu: sudo ufw allow http https
sudo ufw reload
If you’re hosting a VM on our platform, follow our guide to LifeinCloud firewall rules.