
You may have noticed the following warning in Debian 12 when trying to use pip3 to install packages:
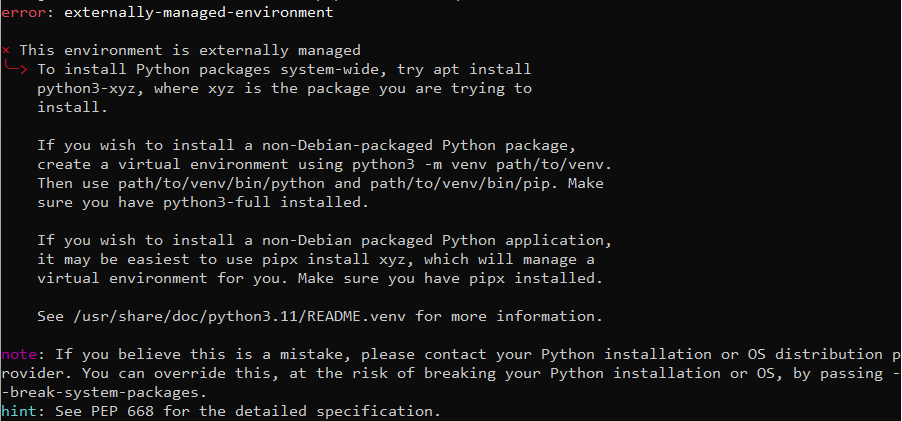
The reason why this is happening may not be so obvious at first, but it is related to breaking your Debian or Python setup.
There are two ways to do this. One is to install packages directly through the apt command, while the other involves using venv and then pip3.
We will do both so we cover all of our bases, starting with apt.
Installing pip3 and Python Packages with APT in Debian 12
One of the first things we need to make sure is installed is pip3. Sure, we jumped ahead to conclusions during our example—but that’s because it’s already installed on the system I’m using.
pip3 stands for preferred installer program 3, the number being a reference to python3. The reason why it exists is to simplify the way packages are installed in any operating system.
And believe me, it used to be weird and sometimes complicated to get a package installed properly before pip became a thing.
To confirm pip3 is installed, run:
apt install python3-pipOnce completed, you can run pip3, and you’ll get the error message shown in the first image.
So how do we go around this?
Searching for Python Packages in Debian with apt
First, we need to know the name of the packages, since not all Python packages are available through the Debian repositories.
We can use apt search to find what we’re looking for. One library we can look for is requests, by running:
apt search python3-requests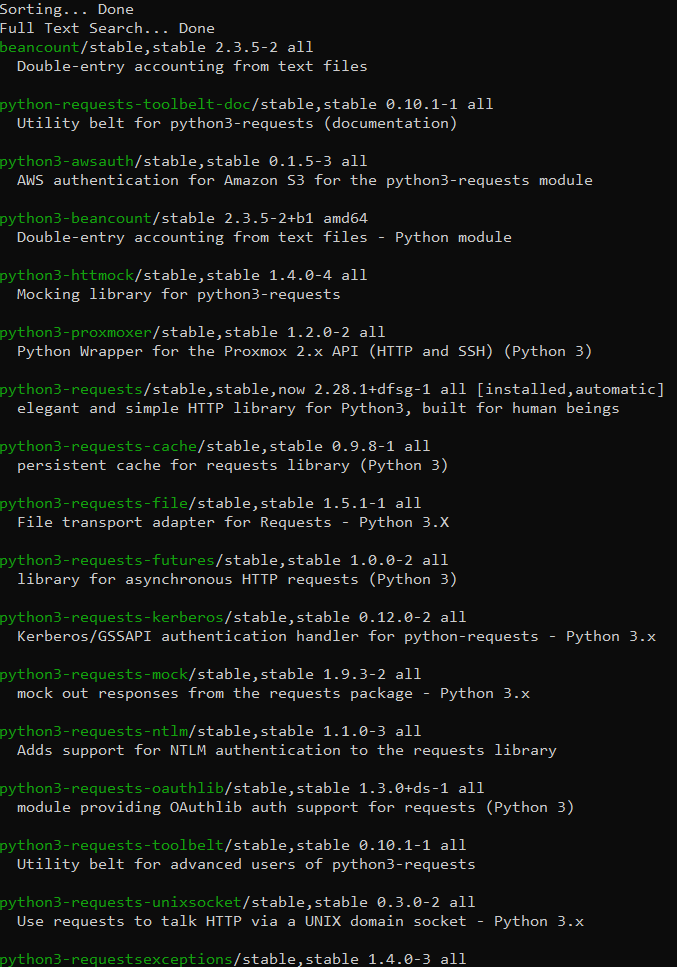
Filtering apt Search Results with grep
The result may be a bit too much for some, and it doesn’t look too intuitive. We can fix this by using grep, a command that allows us to search for specific words.
To use grep, we will pipe (|) the result from one command to the other. Piping is done by using the | symbol, like so:
apt search python3-requests | grep -w "python3-requests"The -w flag is used to look for whole words, which helps reduce the amount of content returned to us.
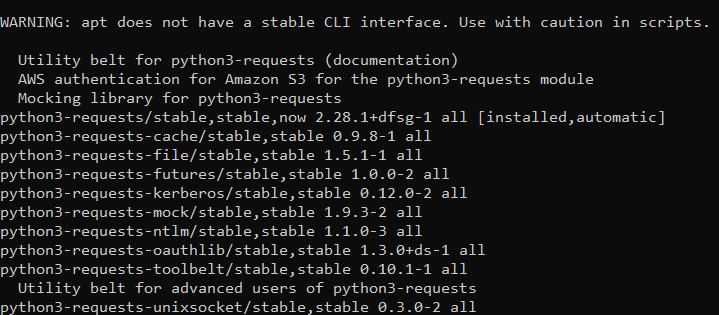
As you can see, the package for python3-requests indicates that it is already installed on the far right.
Finding and Installing Python Packages with pip3 and PyPI
Sometimes you may not be quite sure what you are looking for. For that, there’s PyPI to browse package projects.
The website is also dedicated to hosting some of the packages and projects used by the Python community, enabling you to search and get what you need.
There used to be a feature in pip3 that allowed you to search, but this is no longer available. You can only search through the website itself.
Example: Finding a Package for RCON in Python
One example – I was looking for a Python package that would let me interact with the rcon feature in a Minecraft server. Once I found the package I thought would be best, I clicked on it and got the following:
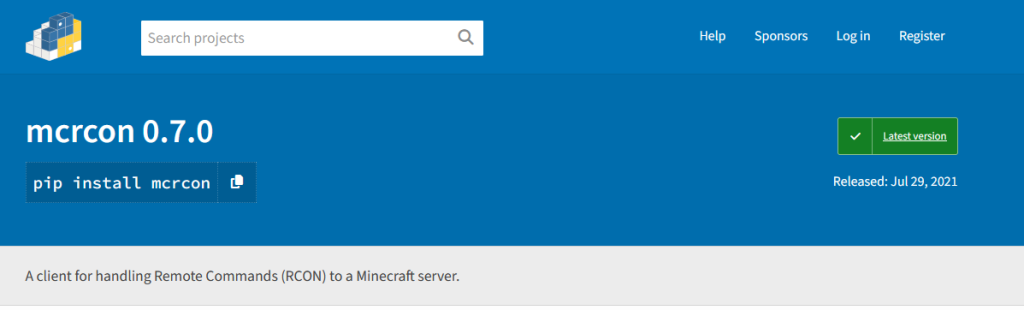
We even get a useful reference on the website on how to install the package. Quite useful!
Remember that in Debian we use pip3 in a venv environment for these, as this package is not available through the Debian repositories.
How to Use pip3 with venv in Debian 12
The reason for using venv is to create separate virtual environments in which we can install the packages that we need.
This means that we can have environments with completely separate packages, and they will not interfere with each other.
Step 1: Install venv
To start working with these, we first need to install venv through apt:
apt install python3-venvStep 2: Create a Virtual Environment
Once completed, we can run venv and create our folder with our virtual environment.
For this example, we’ll use the route /opt, but you can use whichever path you prefer.
Note: /opt is used in Linux to install optional software. That’s why I’m using it here.
Run the command:
python3 -m venv /opt/testStep 3: Activate the Environment
Once done, move to the folder with the cd command and start the virtual environment:
source bin/activateIf successful, the name of the virtual environment will appear at the far left of your prompt, like so: (test).

Step 4: Install Your Python Package with pip3
Now we can install packages using pip3, like the one we mentioned earlier:
pip3 install mcrcon
A warning is given about the package not being compliant with the latest pip3 requirements to use wheel, which is a standard format for Python packages.
Note: This is important, as some packages may not install in the future. Deprecation could eventually mean the package won’t work, so keep an eye out for that.
Step 5: Deactivate the Virtual Environment
If you have ended your work and wish to move out of the virtual environment simply type deactivate and you will be sent back to the host.

Best Practices for Python Package Management in Debian
When working on different projects, it’s best to keep everything inside the virtual environment folder you’ve created. That helps maintain consistency.
Try not to mix packages from other projects, and keep your environments clean—this saves you time and effort in the long run.
More advanced users may find poetry a great tool for managing packages. It helps freeze dependencies and keep your project lean.
While not directly related—but still important—pylint can help ensure you follow Python’s coding standards, and bandit can audit your code for potential vulnerabilities.