
Webmin is a free control panel that you can install on your server. It presents a graphical interface that makes it easy to perform administrative tasks through your web browser. In this guide, I’ll give you step-by-step instructions on how to install Webmin on Ubuntu Server 24.04.
Prerequisites for Webmin
Webmin is lightweight, so it can run on almost any server:
- Operating system: Ubuntu Server 24.04 or another Linux distro.
- Memory: 512 MB RAM minimum
- Storage: 100 MB minimum
You can skip the installation steps below if you’re running a server with LifeinCloud. Try a 1-click install of Webmin from our marketplace.
Webmin Installation on Ubuntu Server 24.04
To install Webmin, you’ll add the official repository to your system, which will then let you install the package.
1. Download the official Webmin setup script: curl -o webmin-setup-repos.sh https://raw.githubusercontent.com/webmin/webmin/master/webmin-setup-repos.sh
2. Run the setup script:sudo sh webmin-setup-repos.sh
When asked to “set up the Webmin repository,” choose Yes.

This script will create a repo with secure keys for package signing. Doing it this way is convenient because Webmin can be updated the same way as the default packages on your system.
3. Install Webmin package: sudo apt install webmin --install-recommends
That was easy—you’re done with the installation! Read on, and I’ll show you how to log in via the web interface and some common tasks you can perform with Webmin.
Log In to Webmin
1. Point your browser to your server’s IP on Webmin’s default port of 10000.
For example, enter https://192.168.1.188:10000 into the address bar (replace 192.168.1.188 with your server’s IP).
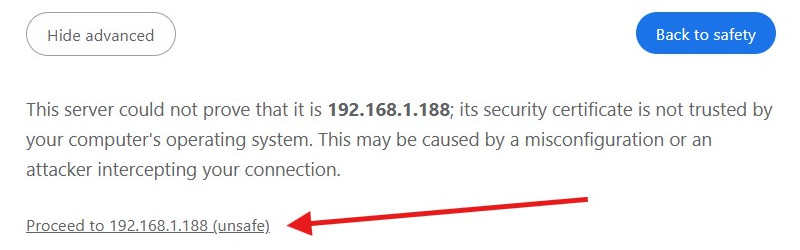
You’ll get a privacy warning. That’s OK because Webmin doesn’t have an SSL/TLS certificate installed yet.
To continue on a browser like Google Chrome, click Advanced and then Proceed.
2. Log in using your system credentials.
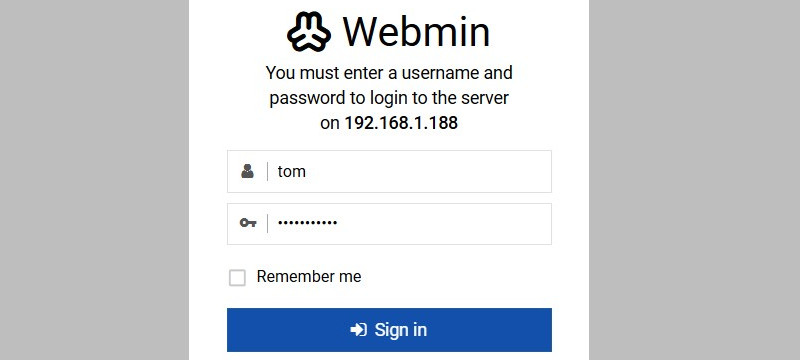
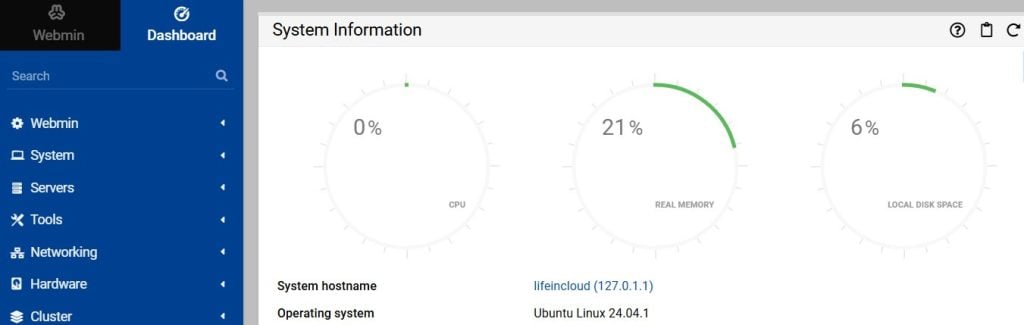
You’re in! The dashboard gives you a summary of your system resources, with tasks you can perform on the left menu.
We’ll cover some example tasks in the next section.
Common Server Administration Tasks With Webmin
Now that Webmin is up and running, I’ll walk through a few examples of some ways to manage your server with it.
Update Your System
You can update your system from the Dashboard, next to Package Updates.
It can also be accessed from System > Software Package Updates.
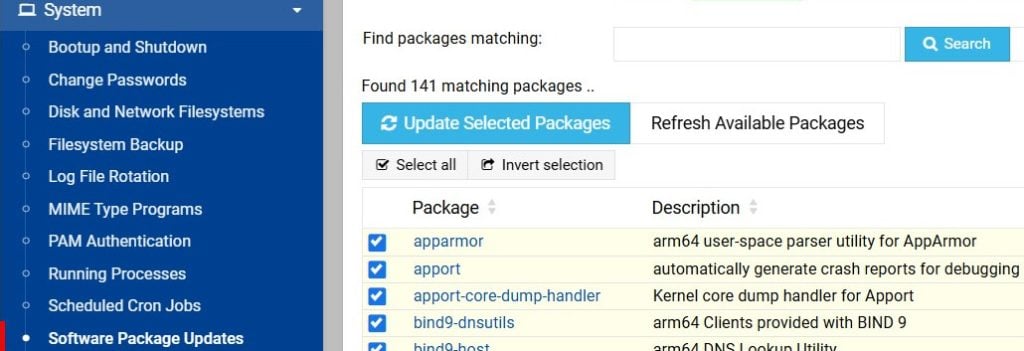
Click Refresh Available Packages to get the newest versions and Update Selected Packages to install them.
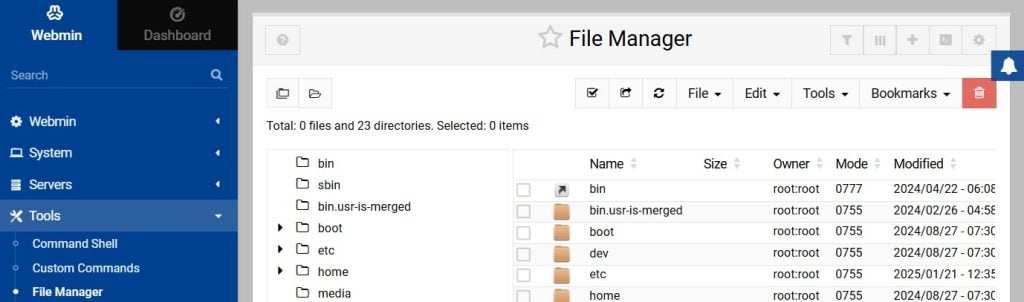
Manage Files
Tired of navigating the Linux file system using the command line?
With Tools > File Manager, you can view folders graphically, as well as move and edit files.
Read System Logs
Go to System > System Logs to peruse your server’s logs.
Webmin has a dropdown that makes it convenient to filter logs by service.
Create Backups
Always have a backup!
To create one, go to System > Filesystem Backup.
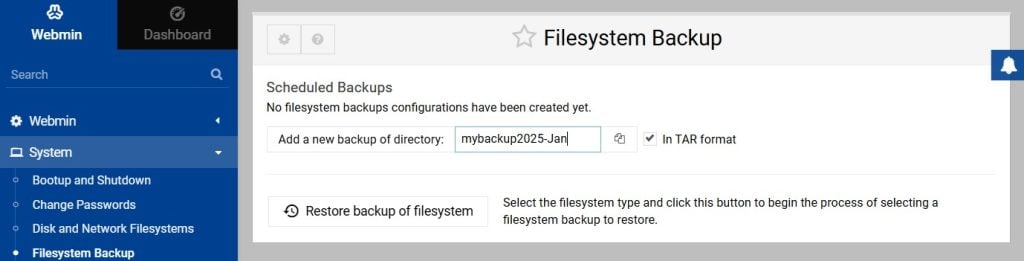
After it’s done creating the backup, you can download the compressed file using Tools > Upload and Download.
Request an SSL Certificate
Webmin can request a free certificate for your website.
It’s found in the Webmin > Webmin Configuration > SSL Encryption > Let’s Encrypt tab.
To learn more, check out our guide to installing free SSL certificates.
Access the Terminal
Every now and then you might still need to access your server’s command line.
Pull up a console in your browser under Tools > Terminal.
Add More Applications and Services
Like other control panels, Webmin lets you add/remove functionality as needed.
These additions are called modules, and Webmin supports over a hundred modules, plus many third-party modules.
To add a module, go to Un-used Modules. From here, you can install popular applications such as:
- Apache: a web server to host a site
- MySQL: a popular database used for services like WordPress
- Fail2Ban: a program that blocks brute-force attempts
- Dovecot / Postfix: servers to receive and send e-mails from your domain
For a complete list, check the official documentation on supported modules and also third-party modules.
That concludes our tour! By using a control panel like Webmin, you can make server maintenance a cinch.
FAQ
Is Webmin completely free?
Yes. There are many server admin panels out there, but few are completely free like Webmin.
For example:
- Easypanel is free for up to 3 projects but requires upgrading to a paid license for unlimited projects.
- Plesk requires a paid license.
- cPanel also charges for a recurring license.
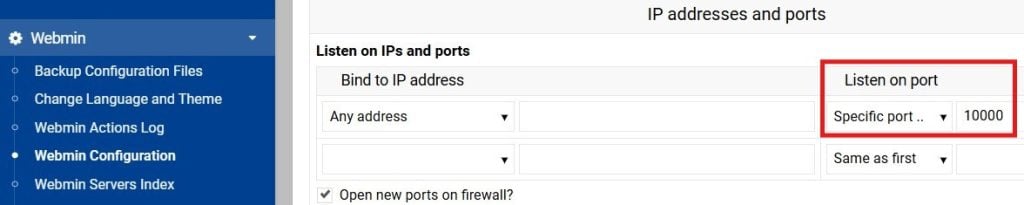
Can I change Webmin’s default port?
Yes. To change the port, go to Webmin > Webmin Configuration > Ports and Addresses.
Change the number under the Listen on port section. Don’t forget to hit Save.
How can I improve security for Webmin?
Every front-facing application on the internet will be attacked before long.
To safeguard yourself, restrict who can access Webmin:
- Besides setting a strong password, the next best option is to enable 2FA under Webmin > Webmin Configuration > Two-Factor Authentication.
- Another precaution is to change the default port as mentioned above.
- You can make a whitelist so only certain IP addresses have access.
Edit it under Webmin > Webmin Configuration > IP Access Control.
Warning: Only use the whitelist method if you know what you’re doing, as you can lock yourself out.
Try whitelisting a range of addresses, as your ISP may have assigned you a dynamic IP.
If you’ve been locked out, log in via SSH and manually add your IP to the whitelist in this file:sudo nano /etc/webmin/miniserv.conf