MySQL and MariaDB are two of the most popular databases used by websites and server applications to store data. One common complaint about using databases is that it can be cumbersome to manage 2D tables from the command line. So today, I’ll show you step-by-step instructions to install a visual solution to database management: phpMyAdmin.
Prerequisites for phpMyAdmin
Software requirements:
- Operating System: Ubuntu Server 24.04 or another Linux distro
- Web server: such as Apache, Nginx, or Caddy for the web interface.
- PHP: a dependency to run phpMyAdmin.
- Database: only MySQL and MariaDB are supported.
Hardware requirements:
- Processor: 1 CPU core
- Memory: 1 GB RAM minimum
- Storage: 30 MB free space
PhpMyAdmin Installation on Ubuntu Server 24.04
As mentioned, this guide assumes you already have a website stack installed.
For instance:
- LAMP stack (Linux + Apache + PHP + MySQL)
- LEMP stack (Linux + Nginx + PHP + MySQL)
- LCMP stack (Linux + Caddy + PHP + MySQL)
If you want a quick way to get a website stack, try our 1-click installers for Apache or Nginx from the LifeinCloud marketplace.
1. Install the phpMyAdmin package:
sudo apt install phpmyadmin
During the installation, dialogue prompts will appear.
2. Choose the Web Server
You’ll be asked to choose which web server you’re using for phpMyAdmin. How you answer here will differ based on your setup.
If you’re using Apache: mark Apache using the spacebar, and hit Enter.
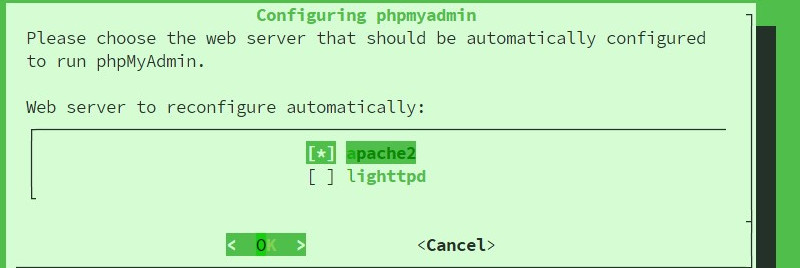
For Nginx instead: without marking anything, Tab down to Ok to skip this question.
Or if you’re using Caddy: without marking anything, Tab down to Ok to skip this question.
Next, you’ll get a request to configure phpMyAdmin with dbconfig-common:

Choosing Yes here is the easier option.
3. Create a phpMyAdmin Password
You’ll be prompted to create a password for the default ‘phpmyadmin’ user.
This username will be used to access the web interface later. Create a strong password to continue.
Then, phpMyAdmin will try to connect to your MySQL database automatically.
During the process, it might request the ‘root’ user password—this is your password for MySQL and not your Linux system.
Note: if you’ve never set a password for MySQL, you’ll get an error here.
The installer will ask you to Abort or Retry. Choose Abort to quit out.
Use this command to set your MySQL password:sudo mysql -u root -p
Once that’s done, restart the installation from the top.
After these responses, phpMyAdmin should finish installing on its own.
4. Configure the Web Server for phpMyAdmin
The final step involves getting your particular web server to load the phpMyAdmin web interface.
Skip down to your web server of choice. When you’re finished, jump to the next section to log in.
Apache: Finishing Touches
The option we marked to use Apache earlier has already configured everything for us.
All we need to do is restart Apache: sudo systemctl restart apache2
Nginx: Finishing Touches
phpMyAdmin resides on your system in /usr/share/phpmyadmin but your website files are in a different place, for instance, /var/www/mysite1.
To get Nginx to see phpMyAdmin, create a symbolic link in the website’s root directory: sudo ln -s /usr/share/phpmyadmin /var/www/mysite1/phpmyadmin
(Replace /var/www/mysite1 with the path to where your website is stored.)
Caddy: Finishing Touches
To get Caddy to see phpMyAdmin, create a symbolic link in the website’s root directory: sudo ln -s /usr/share/phpmyadmin /var/www/mysite1/phpmyadmin
(Replace /var/www/mysite1 with the path to where your website is stored.)
Phew, we’re done with the installation, and now we’re ready to start using phpMyAdmin.
Log In to the PhpMyAdmin Web Interface
Alright, it’s show time!
In your browser, visit http://IP/phpmyadmin (replace IP with your server’s address) to bring up the web interface.
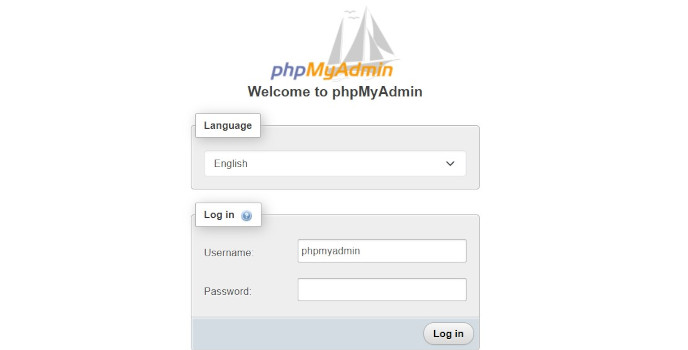
Log in with these credentials:
- Username: phpmyadmin
- Password: the one you set during the installation.
When the dashboard loads, you’re in!
You can use phpMyAdmin to import/export databases, modify table structure, edit data, and run complex queries—all from the convenience of a web browser! Hopefully, it will make your life managing MySQL/MariaDB a lot easier.
FAQ
Should I take extra precautions to secure phpMyAdmin?
Yes. Since it’s commonly found on websites, phpMyAdmin is a popular target.
Here are some security steps I recommend you take:
- Enable two-factor authentication.
- Change the default URL used to access phpMyAdmin.
- Mitigate brute-force attempts.
- Add rules to .htaccess to block bots and script kiddies.
For more security tips, check out the official documentation.